
ESP32 建立WEB服务器并使用POST数据读取示例
目录
在上一篇主要简单介绍了用ESP32搭建WEB服务器和在URL中带参数访问并获取,这次主要介绍使用网页POST的方式提交数据。这样参数或者数据就不会暴露在URL中。
上一篇参考:
ESP32 简单的WEB Server和GET参数读取示例
安装所需的库
接下来,安装所需的库。在Arduino IDE中,转到“工具”>“管理库”,然后搜索并安装以下库:
-
ESPAsyncWebSrv
-
AsyncTCP(仅适用于ESP32)
-
ESPAsyncTCP(仅试用于ESP8266)
程序代码
// welcome to lingshunlab.com

#include <Arduino.h>
#ifdef ESP32
  #include <WiFi.h>
  #include <AsyncTCP.h>
#else
  #include <ESP8266WiFi.h>
  #include <ESPAsyncTCP.h>
#endif
#include <ESPAsyncWebSrv.h>

AsyncWebServer server(80);

// REPLACE WITH YOUR NETWORK CREDENTIALS
const char* ssid = "YOUR_SSID";
const char* password = "YOUR_PASSWORD";

// HTML web page to handle input fields
const char index_html[] PROGMEM = R"rawliteral(
<!DOCTYPE HTML><html><head>
  <title>ESP Input Form</title>
  <meta name="viewport" content="width=device-width, initial-scale=1">
  </head><body>
  <form action="/get" method="GET">
    Get Input value: <input type="text" name="getInput">
    <input type="submit" value="Submit">
  </form><br>
  <form action="/post" method="POST">
    Post Input value: <input type="text" name="postInput">
    <input type="submit" value="Submit">
  </form><br>
</body></html>)rawliteral";

void notFound(AsyncWebServerRequest *request) {
  request->send(404, "text/plain", "Not found");
}

void setup() {
  Serial.begin(115200);
  WiFi.mode(WIFI_STA);
  WiFi.begin(ssid, password);
  if (WiFi.waitForConnectResult() != WL_CONNECTED) {
    Serial.println("WiFi Failed!");
    return;
  }
  Serial.println();
  Serial.print("IP Address: ");
  Serial.println(WiFi.localIP());

  // Send web page with input fields to client
  server.on("/", HTTP_GET, [](AsyncWebServerRequest *request){
    request->send_P(200, "text/html", index_html);
  });

  // GET request to <ESP_IP>/post?xxx=yyy
  server.on("/get", HTTP_GET, [] (AsyncWebServerRequest *request) {
    int params = request->params();
    for(int i=0;i<params;i++){
      AsyncWebParameter* p = request->getParam(i);
      Serial.printf("GET[%s]: %s\n", p->name().c_str(), p->value().c_str());
    }

    request->send(200, "text/html", "HTTP GET request sent to your ESP on input");
  });

  // POST request to <ESP_IP>/post
  server.on("/post", HTTP_POST, [](AsyncWebServerRequest *request){
    int params = request->params();
    for(int i=0;i<params;i++){
      AsyncWebParameter* p = request->getParam(i);
      Serial.printf("POST[%s]: %s\n", p->name().c_str(), p->value().c_str());
    }
    request->send(200, "text/html", "HTTP POST request sent to your ESP on input");
  });

  server.onNotFound(notFound);
  server.begin();
}

void loop() {

}
说明提点
1,修改代码中的YOUR_SSID和YOUR_PASSWORD,将其替换为您的Wi-Fi网络凭据。
2,将ESP32连接到计算机,然后在Arduino IDE中选择正确的端口和开发板。
3,上传代码到ESP32。
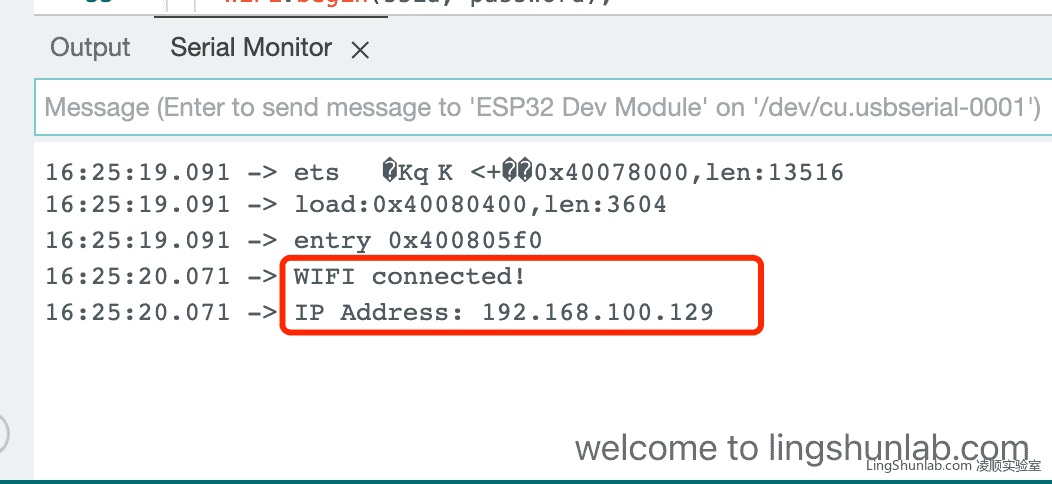
4,代码上传成功后,打开串行监视器。在串行监视器,您应该会看到ESP32连接到Wi-Fi网络的消息。一旦连接成功,它将显示“IP Address:xxx.xxx.xxx.xxx”。
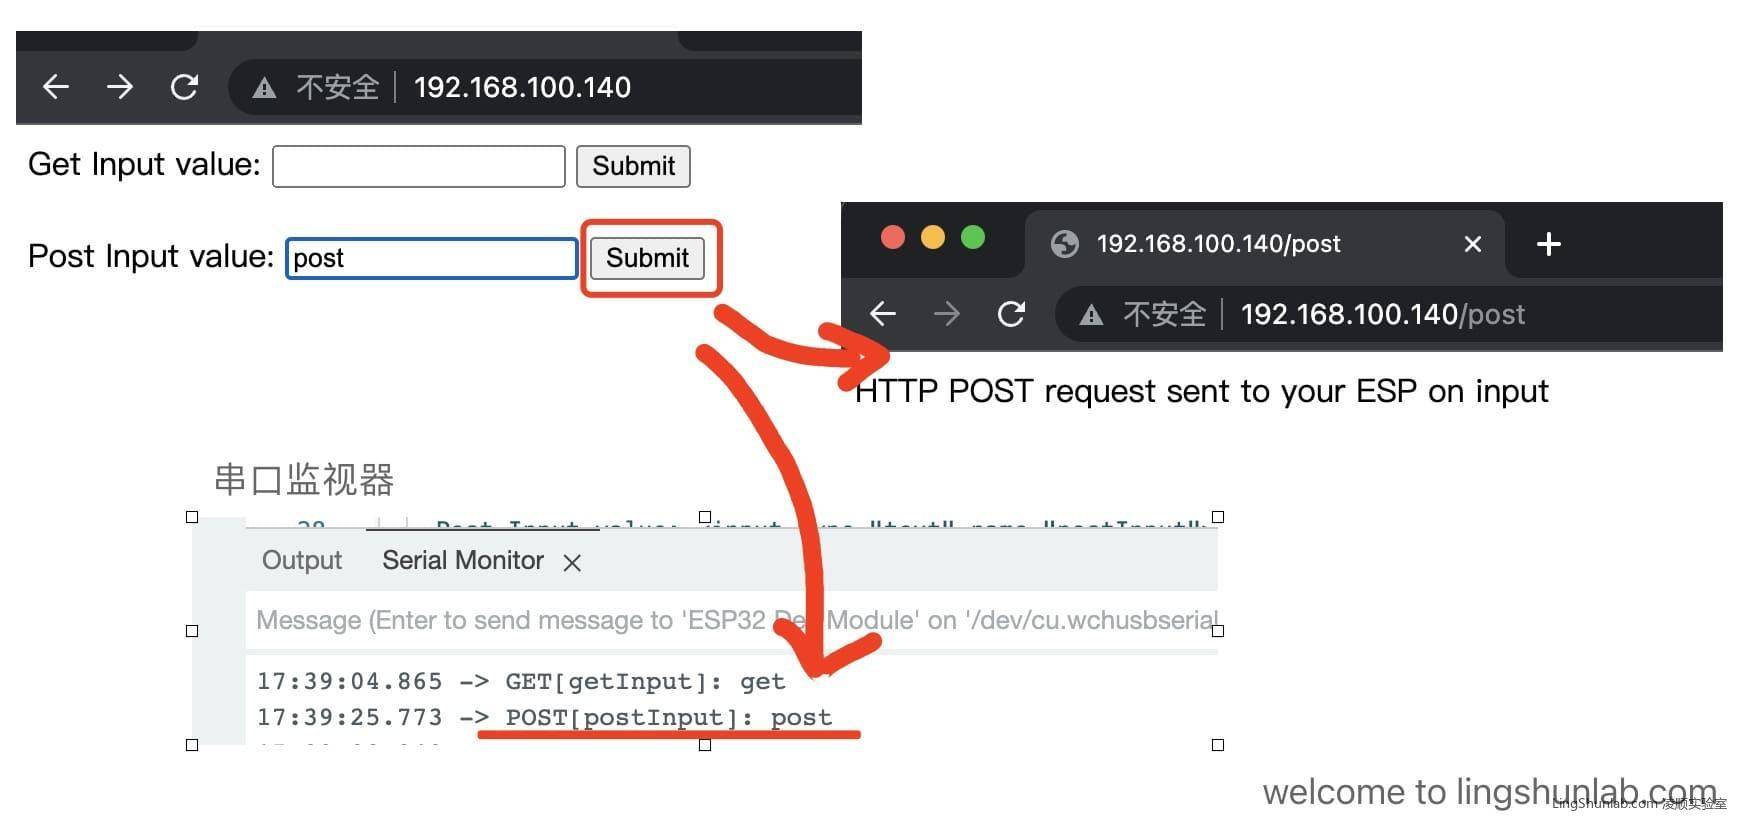
5,在浏览器中输入ESP32的IP地址
可用看到如下输入框,在POST Input中输入需要提交的数据,按「Submit」后,即可在串口监视器中ESP32返回刚才提交的数据。
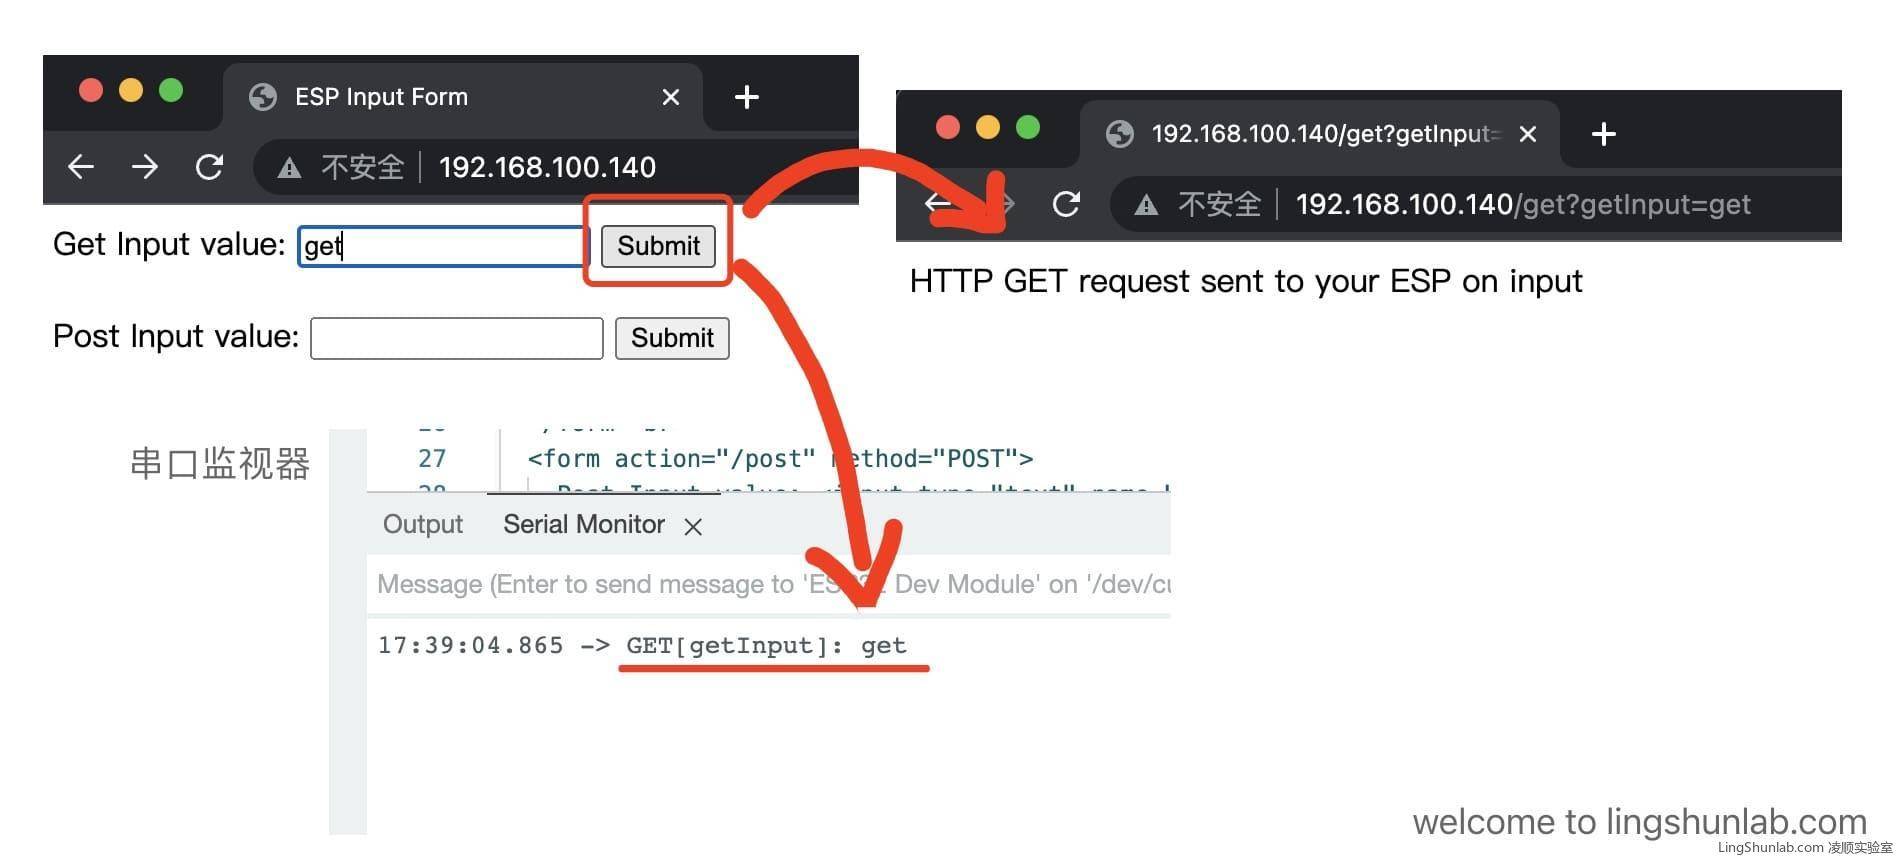
以下是GET数据的用法,与POST类似。

")
