Arduino Uno 使用LD2410人体存在感应检测模块
目录
实验效果
Arduino Uno 利用LD2410B人体感应模组进行人体检测,并通过串口输出相关数据。

元件介绍
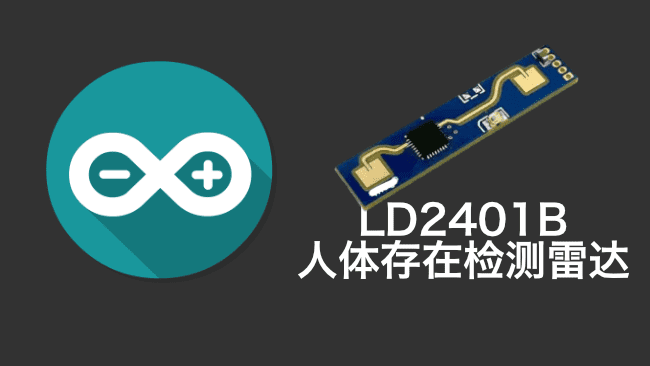
LD2410B是一款高灵敏度, 24GHZ 的人体感应模组,采用FMCW(调频连续波)技术和先进的雷达信号处理算法来探测设定区域内的人体。该模组能够高效识别人体的运动及静止状态,并准确计算目标距离等重要信息。其主要应用于室内场景,能够实时监测有无人体移动或微动,最远探测距离达到6米,分辨率为0.75米。通过提供的配置工具,用户可以自定义感应距离、灵敏度和无人状态下的延时设定。同时,该模组支持GPIO和UART输出,方便即插即用,适合多种智能应用场景和终端产品的需求。
产品特征:
- 频率: 24G-24.25GHz
- 调制方式: FMCW
- 检测距离: 0.75~6m
- 可调探测角度: 土60
- 供电: 5V
- 电流: ~79mA
- 输出串口电平: 3.3V
- 扫频带宽:250MHz(符合CE/FCC认证标准
- 环境温度:-40°C~+85°C
- 数据格式:串口ASCII输出/高低电平3.3V&OV
- 封装形式:默认带插针,可定制座子或不带插针
这个模块调试非常简单,只要模块通电,即可使用手机通过蓝牙连接模块,查看里面的数据和配置灵敏度。
引脚说明
- OUT: 用于目标状态的输出信号。当检测到人体时输出高电平,未检测到时则输出低电平。
- UART_Tx:为串口的发送引脚。
- UART_Rx: 为串口的接收引脚。
- GND: 电源地线。
- VCC: 电源输入端,需要5V直流电源供电。
BOM
Arduino Uno __ x1
LD2401B 人体存在检测模块 __ x1
接线图

| LD2410B 引脚 | <-> | Arduino 引脚 |
|---|---|---|
| 5V | <-> | 5V |
| GND | <-> | GND |
| UART Rx | <-> | 1 |
| UART Tx | <-> | 0 |
安装库
LD2410
用于 Hi-Link LD2410 24Ghz FMCW 雷达传感器的 Arduino库,也适用于ESP系列开发板。该传感器是一种频率调制连续波雷达,可用于存在检测,并可配置其在不同范围内对静态和移动目标的灵敏度。
https://github.com/ncmreynolds/ld2410
可在Arduino IDE的「库管理」中搜索「LD2410」并安装,也可以在Github上下载手动安装。
完整程序
在Arduino IDE中,记得选择好正确的开发板,程序会根据开发板进行配置相对应的串口引脚。
// welcome to www.lingshuunlab.com

/*
 * Example sketch for reporting on readings from the LD2410 using whatever settings are currently configured.
 *
 * This has been tested on the following platforms...
 *
 * On ESP32, connect the LD2410 to GPIO pins 32&33
 * On ESP32S2, connect the LD2410 to GPIO pins 8&9
 * On ESP32C3, connect the LD2410 to GPIO pins 4&5
 * On Arduino Leonardo or other ATmega32u4 board connect the LD2410 to GPIO pins TX & RX hardware serial
 *
 * The serial configuration for other boards will vary and you'll need to assign them yourself
 *
 * There is no example for ESP8266 as it only has one usable UART and will not boot if the alternate UART pins are used for the radar.
 *
 * For this sketch and other examples to be useful the board needs to have two usable UARTs.
 *
 */

#if defined(ESP32)
  #ifdef ESP_IDF_VERSION_MAJOR // IDF 4+
    #if CONFIG_IDF_TARGET_ESP32 // ESP32/PICO-D4
      #define MONITOR_SERIAL Serial
      #define RADAR_SERIAL Serial1
      #define RADAR_RX_PIN 32
      #define RADAR_TX_PIN 33
    #elif CONFIG_IDF_TARGET_ESP32S2
      #define MONITOR_SERIAL Serial
      #define RADAR_SERIAL Serial1
      #define RADAR_RX_PIN 9
      #define RADAR_TX_PIN 8
    #elif CONFIG_IDF_TARGET_ESP32C3
      #define MONITOR_SERIAL Serial
      #define RADAR_SERIAL Serial1
      #define RADAR_RX_PIN 4
      #define RADAR_TX_PIN 5
    #else
      #error Target CONFIG_IDF_TARGET is not supported
    #endif
  #else // ESP32 Before IDF 4.0
    #define MONITOR_SERIAL Serial
    #define RADAR_SERIAL Serial1
    #define RADAR_RX_PIN 32
    #define RADAR_TX_PIN 33
  #endif
#elif defined(__AVR_ATmega32U4__)
  #define MONITOR_SERIAL Serial
  #define RADAR_SERIAL Serial1
  #define RADAR_RX_PIN 0
  #define RADAR_TX_PIN 1
#endif

#include <ld2410.h>

ld2410 radar;

uint32_t lastReading = 0;
bool radarConnected = false;

void setup(void)
{
  MONITOR_SERIAL.begin(115200); //Feedback over Serial Monitor
  //radar.debug(MONITOR_SERIAL); //Uncomment to show debug information from the library on the Serial Monitor. By default this does not show sensor reads as they are very frequent.
  #if defined(ESP32)
    RADAR_SERIAL.begin(256000, SERIAL_8N1, RADAR_RX_PIN, RADAR_TX_PIN); //UART for monitoring the radar
  #elif defined(__AVR_ATmega32U4__)
    RADAR_SERIAL.begin(256000); //UART for monitoring the radar
  #endif
  delay(500);
  MONITOR_SERIAL.print(F("\nConnect LD2410 radar TX to GPIO:"));
  MONITOR_SERIAL.println(RADAR_RX_PIN);
  MONITOR_SERIAL.print(F("Connect LD2410 radar RX to GPIO:"));
  MONITOR_SERIAL.println(RADAR_TX_PIN);
  MONITOR_SERIAL.print(F("LD2410 radar sensor initialising: "));
  if(radar.begin(RADAR_SERIAL))
  {
    MONITOR_SERIAL.println(F("OK"));
    MONITOR_SERIAL.print(F("LD2410 firmware version: "));
    MONITOR_SERIAL.print(radar.firmware_major_version);
    MONITOR_SERIAL.print('.');
    MONITOR_SERIAL.print(radar.firmware_minor_version);
    MONITOR_SERIAL.print('.');
    MONITOR_SERIAL.println(radar.firmware_bugfix_version, HEX);
  }
  else
  {
    MONITOR_SERIAL.println(F("not connected"));
  }
}

void loop()
{
  radar.read();
  if(radar.isConnected() && millis() - lastReading > 1000)  //Report every 1000ms
  {
    lastReading = millis();
    if(radar.presenceDetected())
    {
      if(radar.stationaryTargetDetected())
      {
        Serial.print(F("Stationary target: "));
        Serial.print(radar.stationaryTargetDistance());
        Serial.print(F("cm energy:"));
        Serial.print(radar.stationaryTargetEnergy());
        Serial.print(' ');
      }
      if(radar.movingTargetDetected())
      {
        Serial.print(F("Moving target: "));
        Serial.print(radar.movingTargetDistance());
        Serial.print(F("cm energy:"));
        Serial.print(radar.movingTargetEnergy());
      }
      Serial.println();
    }
    else
    {
      Serial.println(F("No target"));
    }
  }
}
把程序上传,打开串口就可以开始测试,并观察数据。


